Learn step-by-step how to connect to your Synology NAS via SSH securely, and manage your device from the terminal easily. Let’s get started.
Step 1: Enable SSH service on your Synology NAS
- Open a web browser and access the management interface of your Synology NAS.
http://192.168.x.xohttps://ip-nas.local. - Sign in with an administrator account.
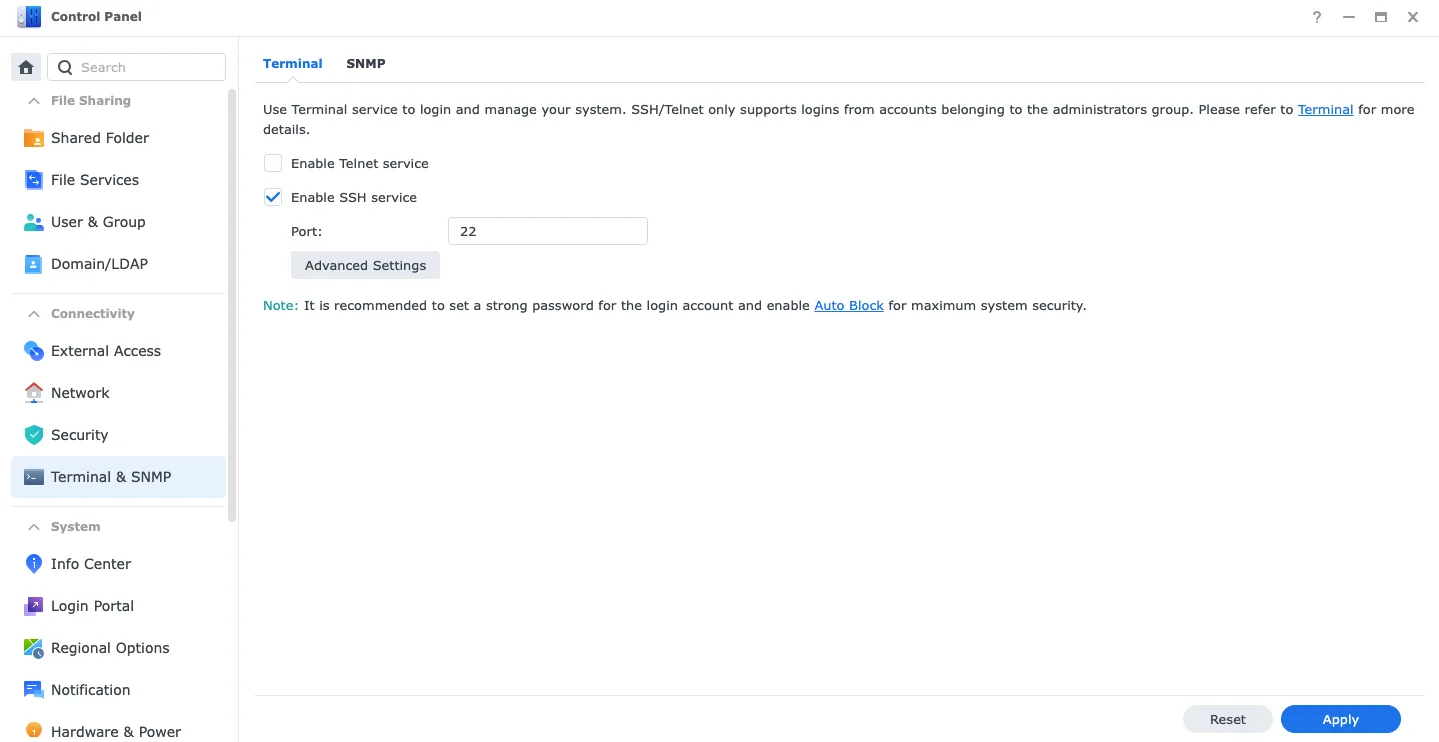
- Go to Control Panel → Terminal and SNMP.
- On the Terminal tab, check the Enable SSH service box.
- Make sure to use the default port 22 or change it if you need more security.
- Click Apply to save changes.
Step 2: Connect to Synology NAS via SSH
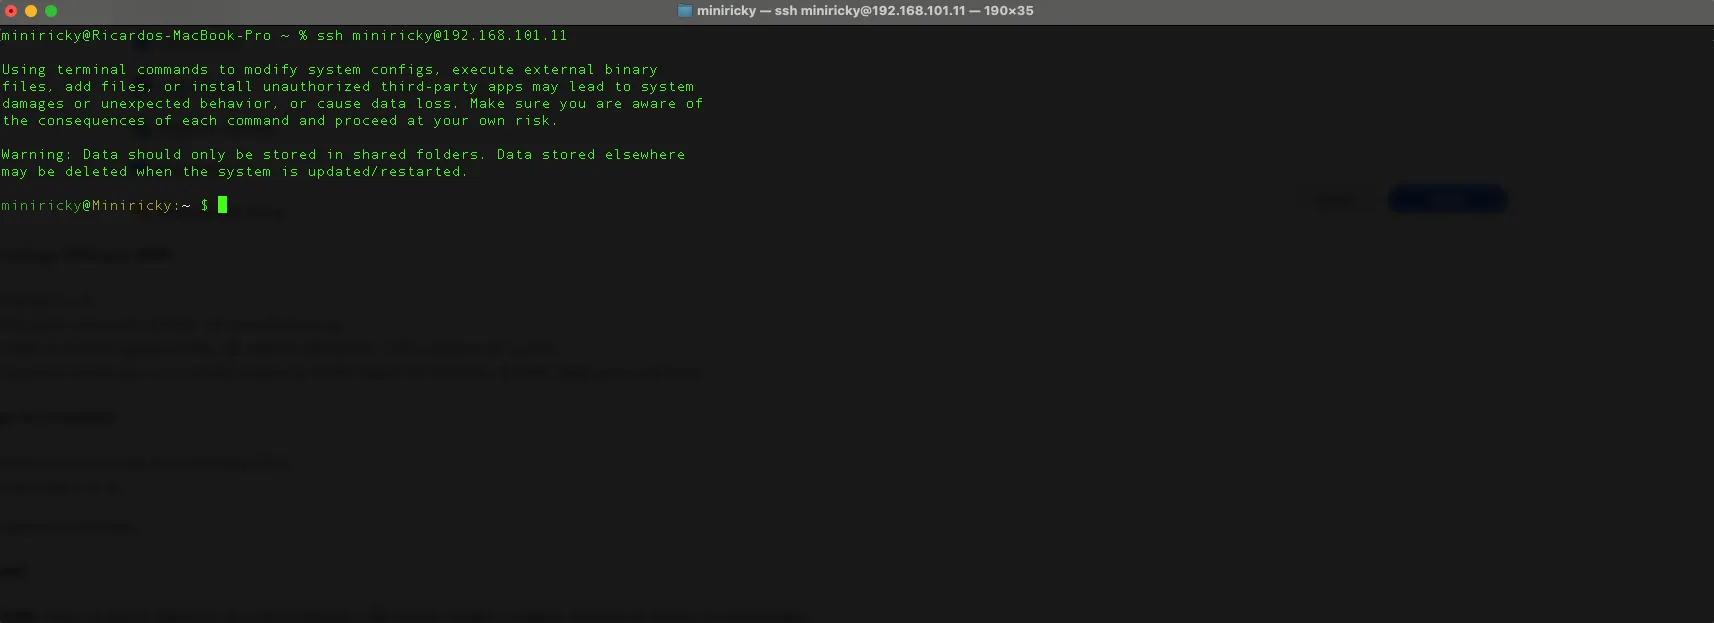
- Open Terminal on your local computer.
- Use the following command to connect to the NAS:
ssh user@nas-ip - If you changed the SSH port on the NAS, add the -p flag followed by the port: ssh user@nas-ip -p port
- The first time you connect, you may be asked to accept the server’s fingerprint. Type yes to continue.
Step 3: Test and verify the connection
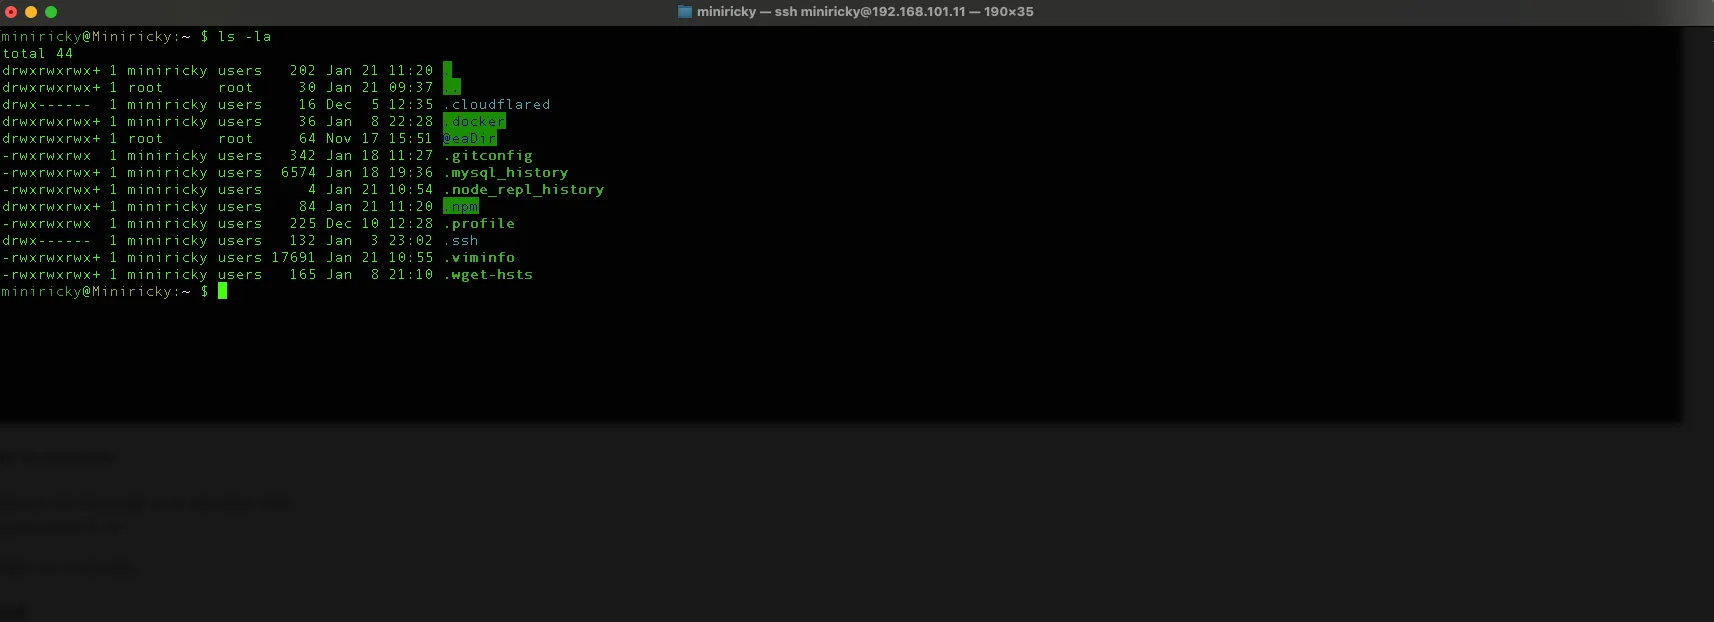
- Once connected, you should see the prompt of your Synology NAS.
- You can run commands like: ls -la to list directories or navigate the system.
Safety Tips
- Change the SSH port: Using a port other than the default (22) can help reduce unauthorized access attempts.
- Use non-administrator users: Unless strictly necessary, use a standard user to connect via SSH and avoid using root or admin.