In this article, you’ll learn how to create a new user on your Synology NAS, assign them custom permissions, and configure their access to folders and applications. Follow this step-by-step guide to optimize the use of your NAS and maintain precise control over shared resources. Let’s get started!
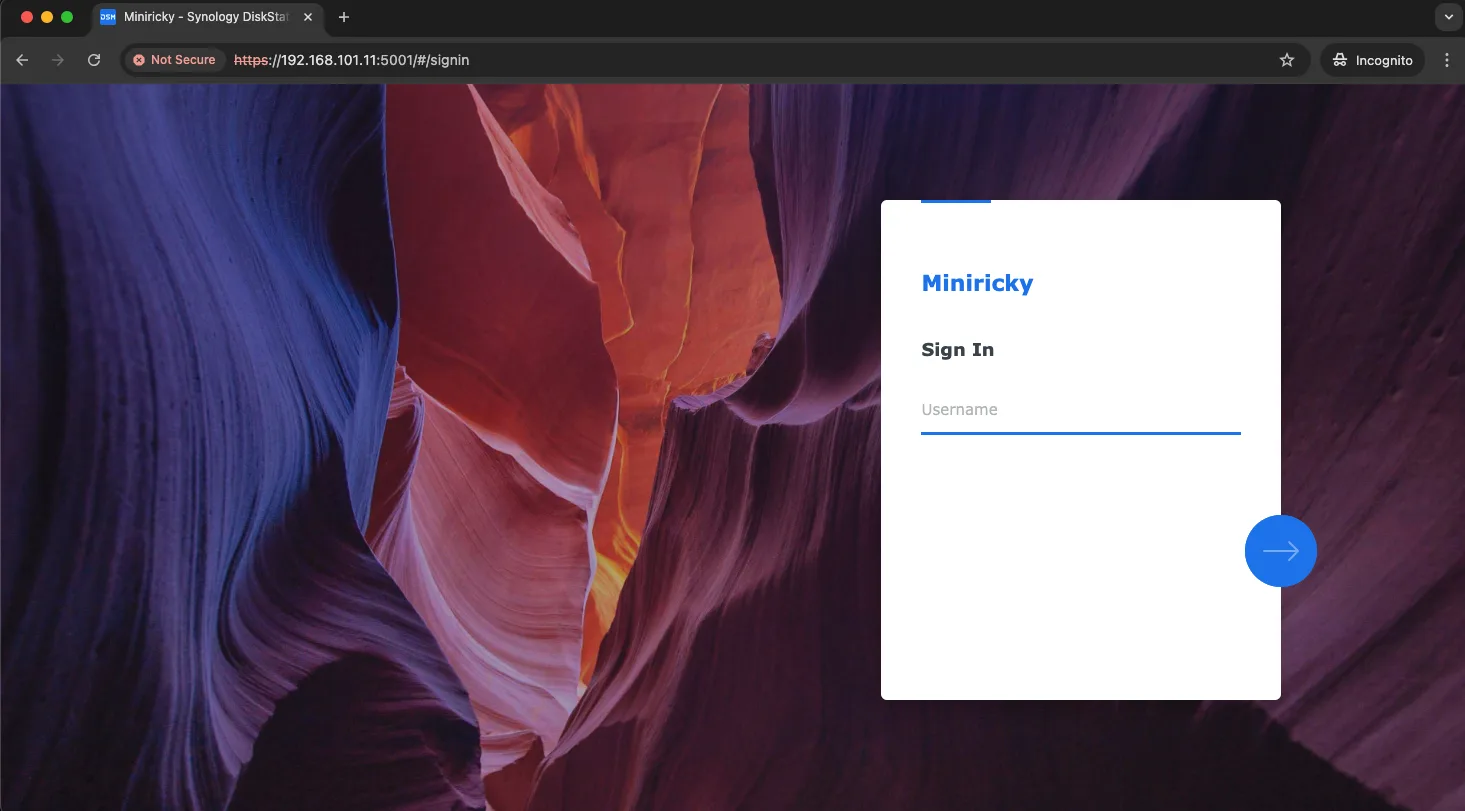
Step 1: Access the Synology NAS management interface
- Open a web browser and access the IP address or domain of your Synology NAS.
- Example: http://192.168.x.x o https://tu-dominio-nas.local.
- Please log in with an administrator account.
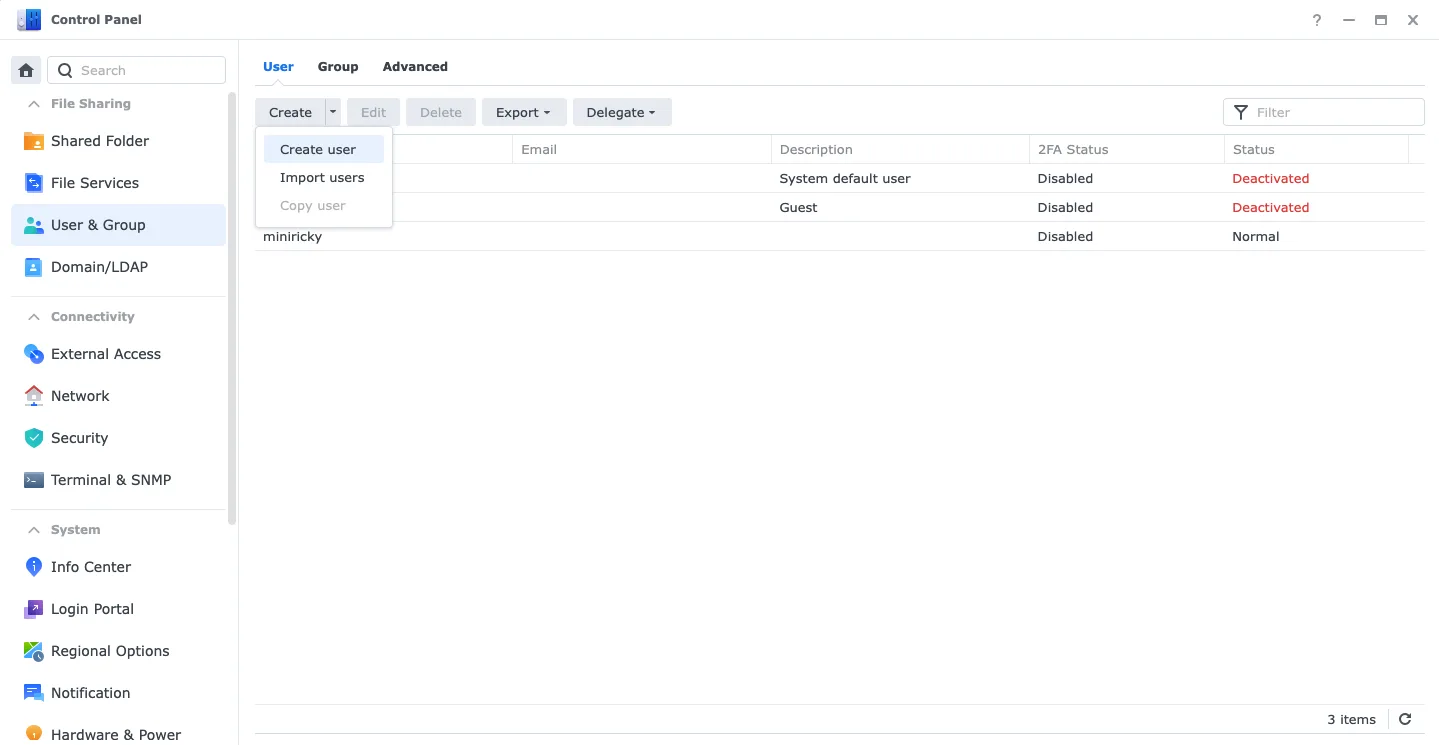
Step 2: Create a new user
- Go to Control Panel from the main interface of Synology NAS.
- Select the Users option in the Shared Privileges section.
- Click the Create button > Create User.
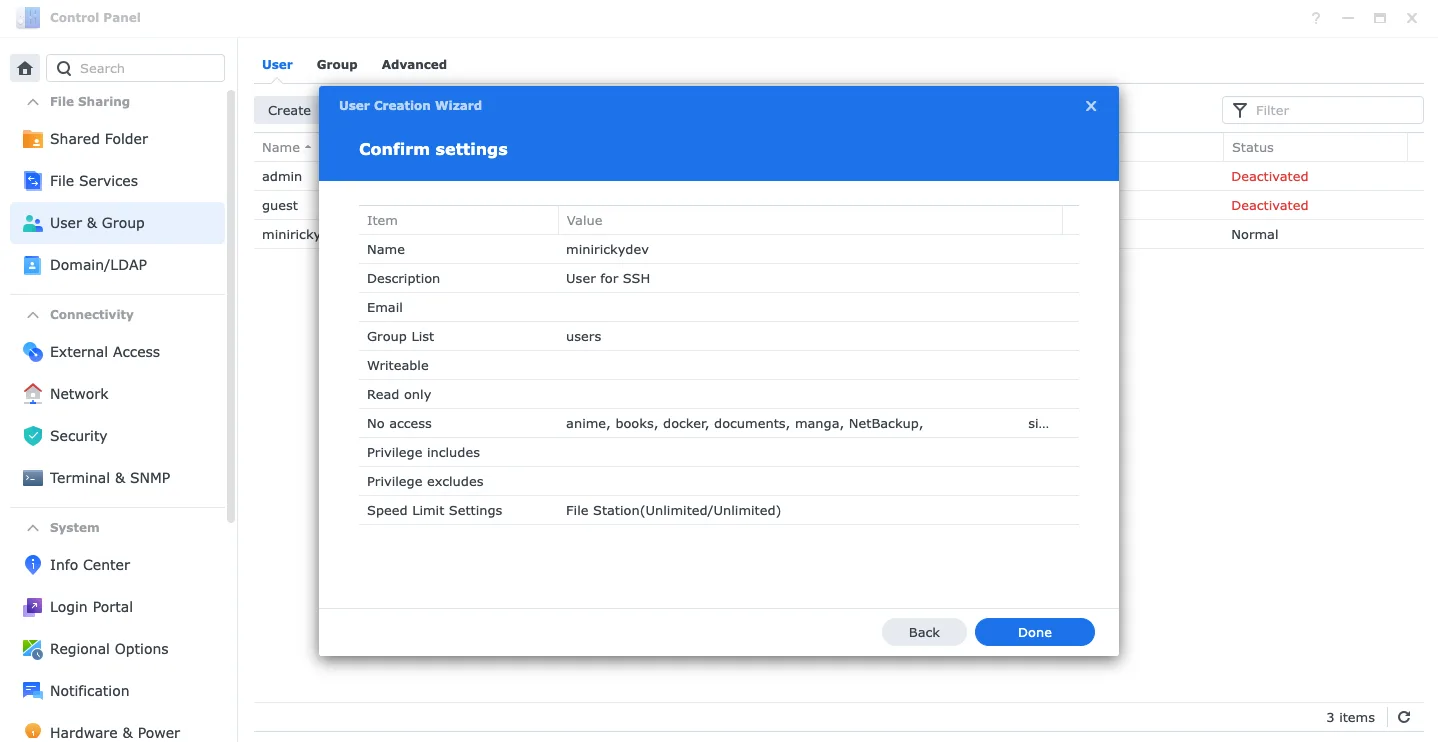
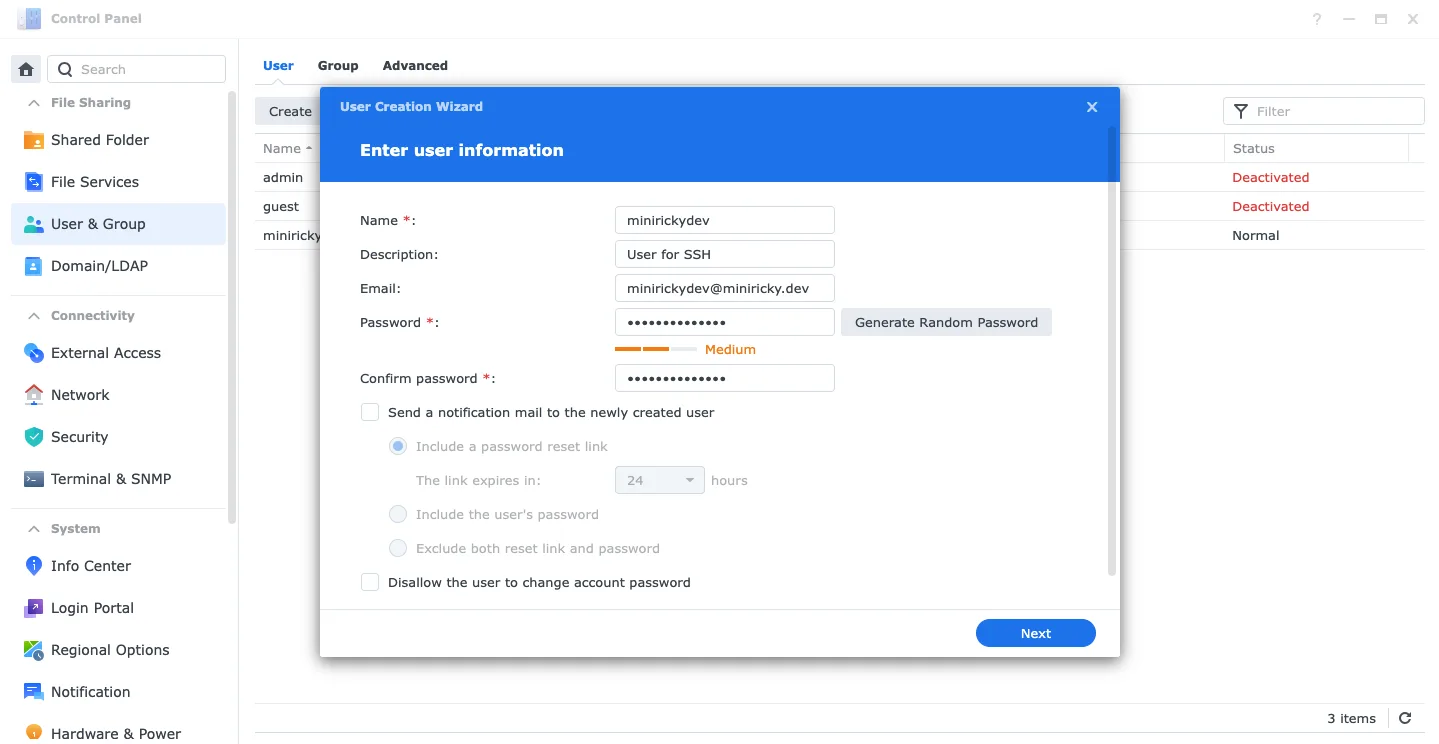
Step 3: Set up the new user
In the user creation window, follow these steps:
3.1. General information
- Username: Enter the username (for example, minirickydev).
- Description: Optional, you can add a short description of the user (for example, “User for SSH”).
- Email: Enter a user email (optional).
- Password: Set a strong password for the user.
- Be sure to use a combination of letters, numbers and symbols for added security.
- Confirm Password: Re-enter your password.
Click Next.
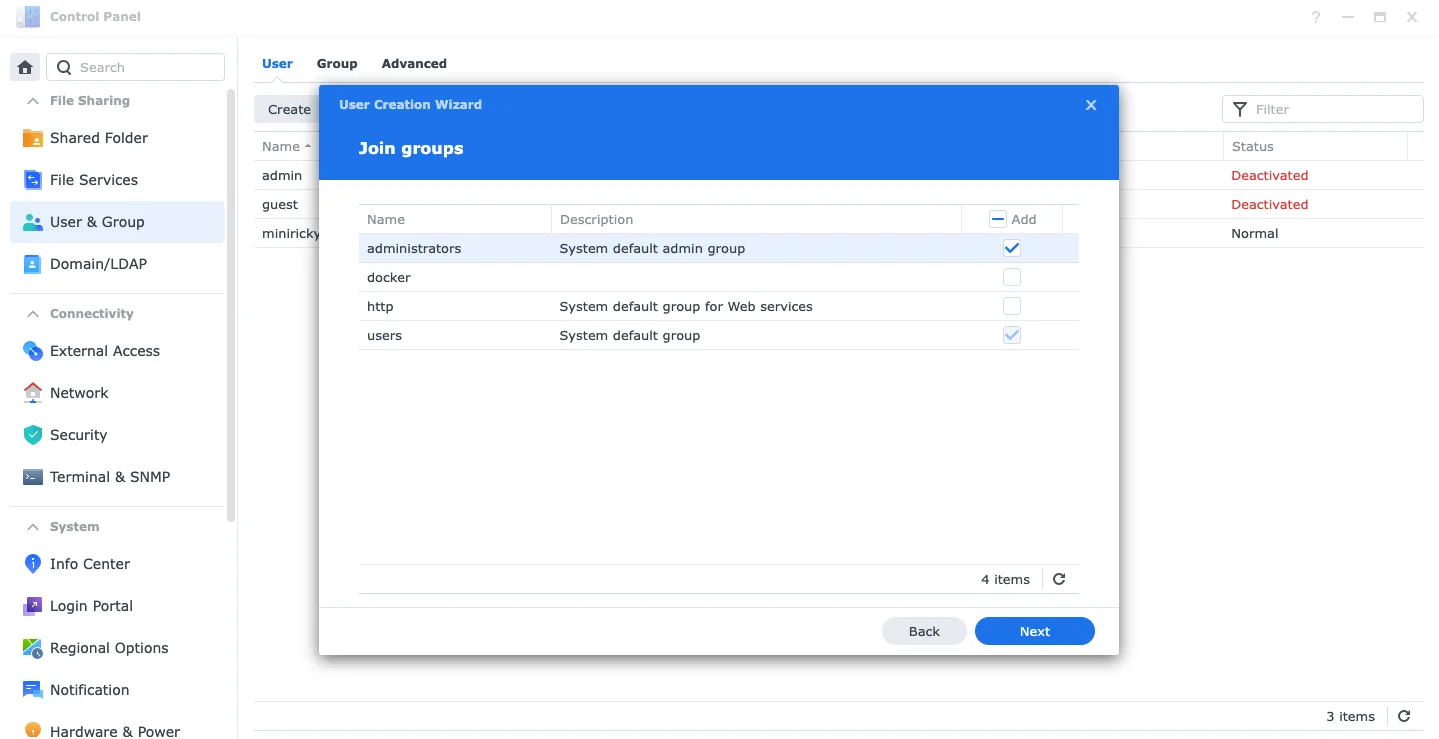
3.2. Assign groups
- Select which group(s) the user will belong to.
- administrators: If you want the user to have administrator permissions.
- users: For a standard user with limited permissions.
- If you need to customize permissions, you can create a new group from the Groups tab before assigning the user.
Click Next.
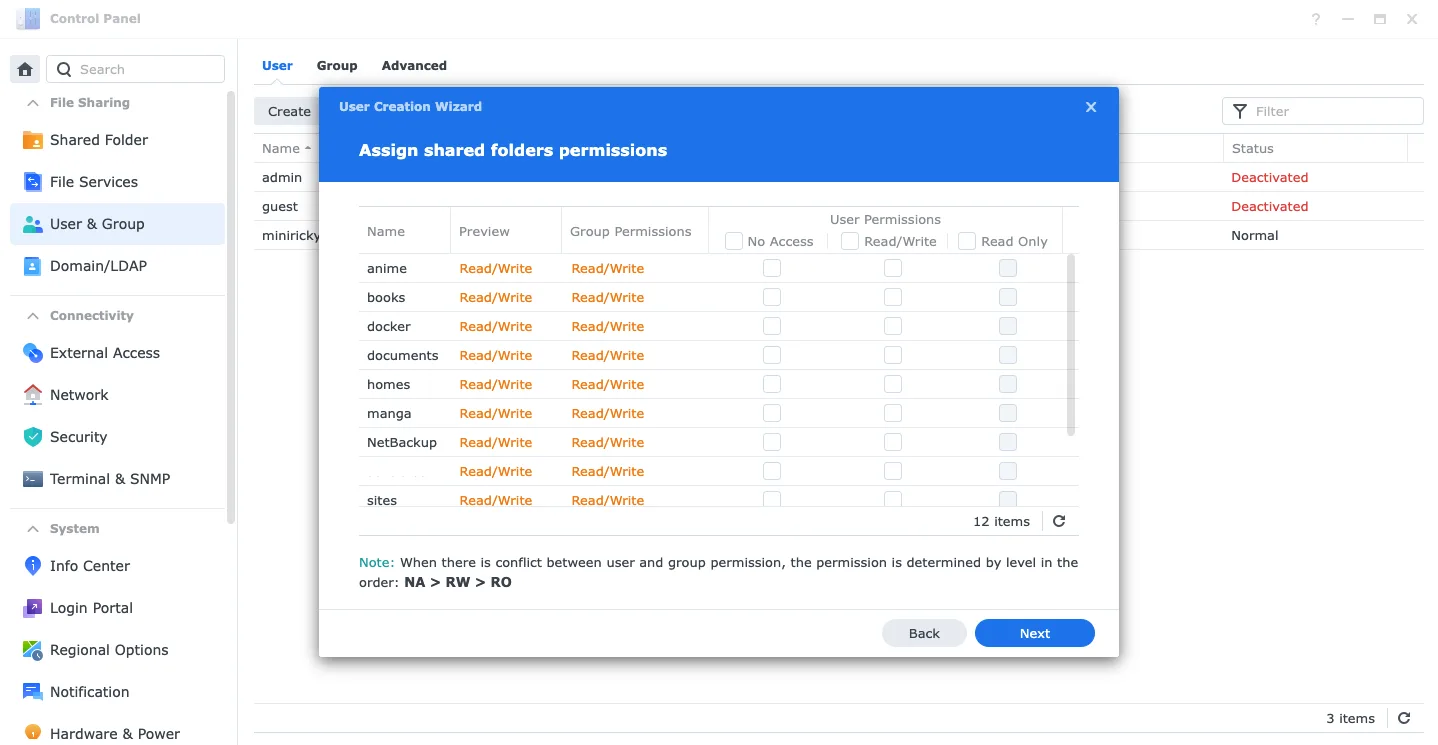
3.3. Configure shared folder permissions
- A list of shared folders on your NAS will appear.
- Define permissions for each folder:
- Read/Write: Full access.
- Read only: You can view but not modify the content.
- No Access: You cannot view or access the folder.
Click Next.
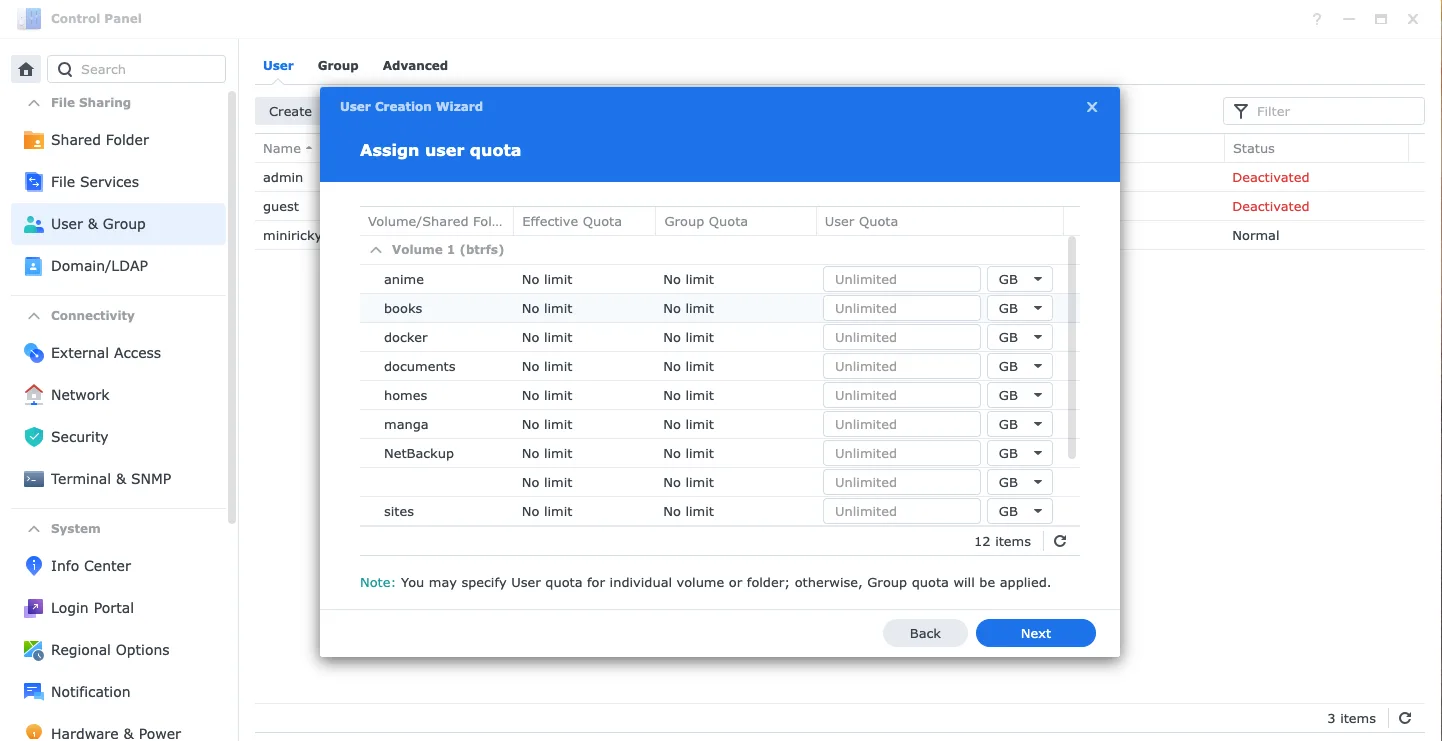
3.4. Assign storage quotas (optional)
- If you want to limit the user’s disk space, set a limit (for example, 10 GB) for each shared folder, if necessary.
Click Next.
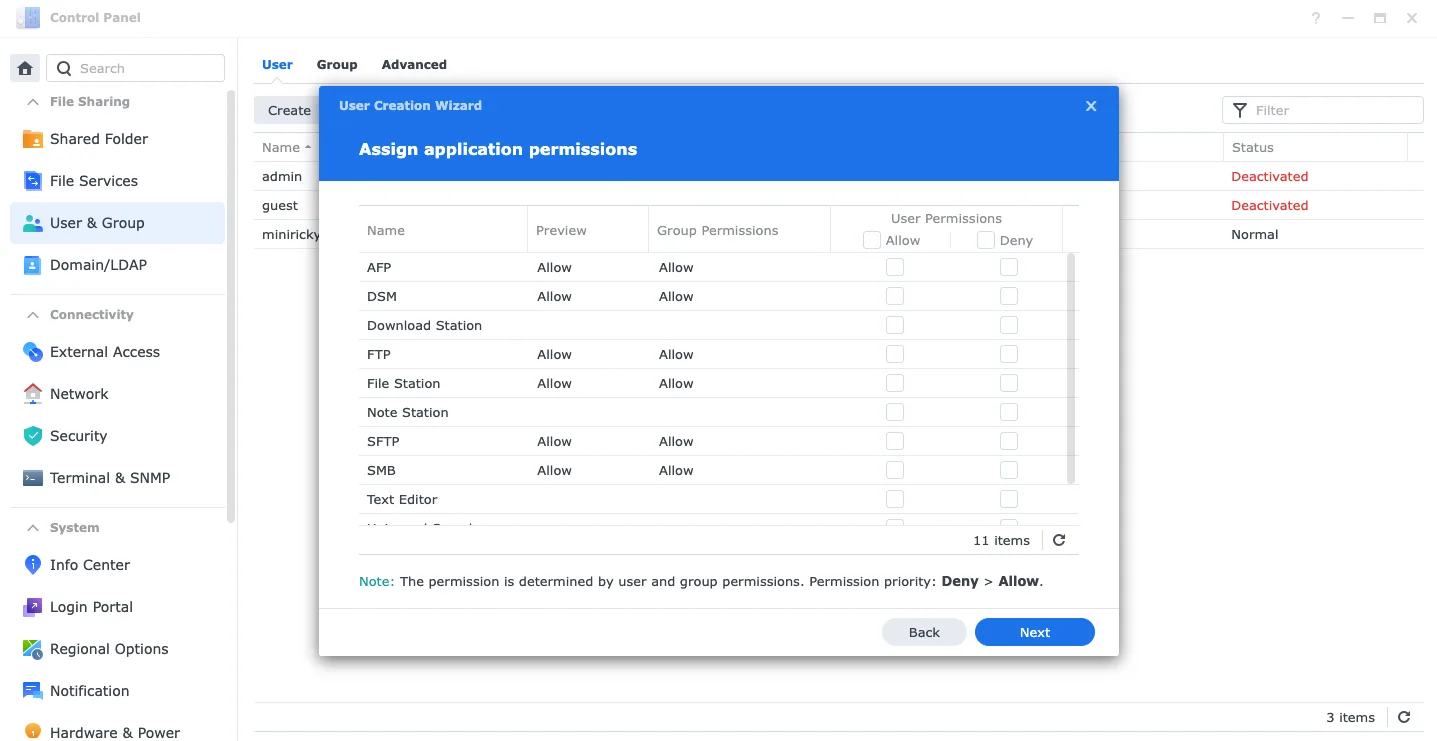
3.5. Configure app permissions
- In this section, select which NAS applications the user can access.
- For example, enable access to File Station, Docker, or Web Station if needed.
- Check or uncheck the boxes depending on the permissions you want to grant.
Click Next.
3.6. Confirmation and creation
- Review the user configuration summary.
- If everything is correct, click Apply to finish creating the user.